Guide to Self Drilling Screws and how to install them
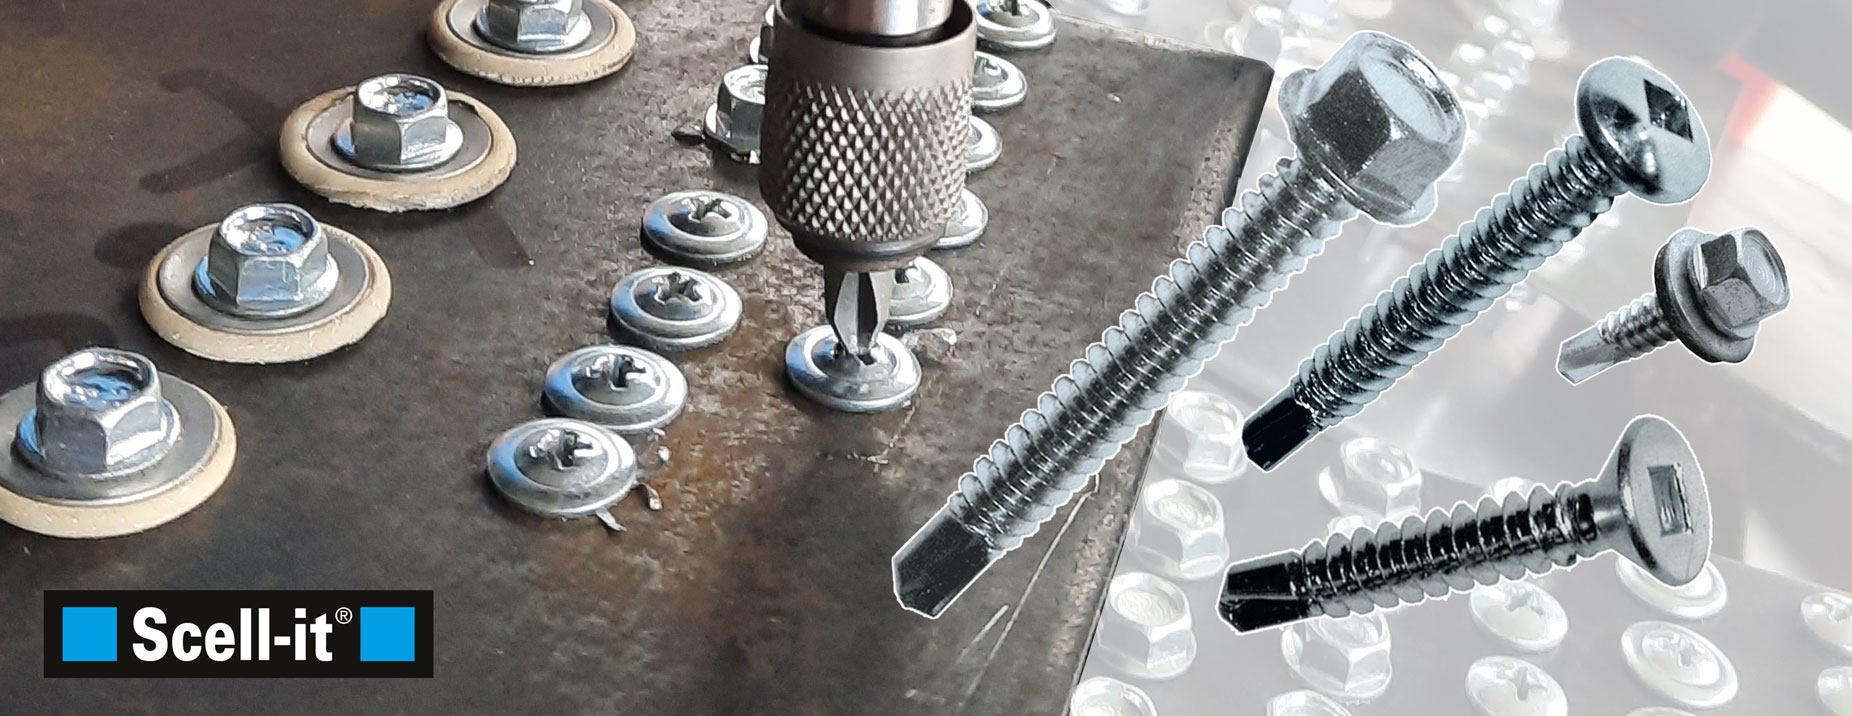
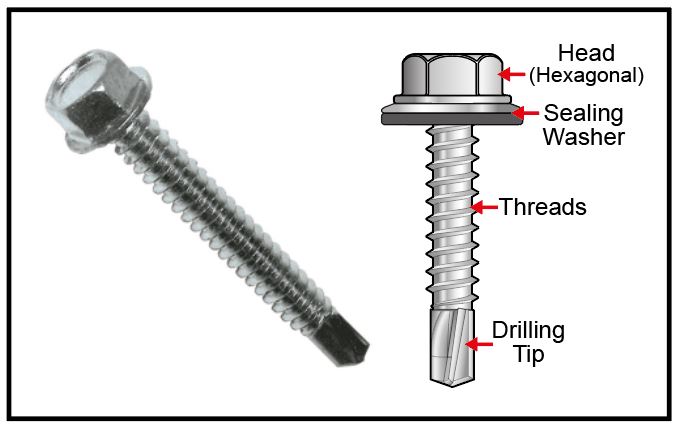 Self-drilling screws are a type of fastener that can drill and tap its hole in a single operation. This makes them ideal for use in applications where it is difficult or impossible to drill a pilot hole first, such as fastening sheet metal to wood or other surfaces. Self-drilling screws have a sharp, tapered tip that cuts through the material it is being fastened to. The screw then threads itself into the material, creating a secure hold.
Self-drilling screws are a convenient and versatile way to fasten materials together with many advantages such as:
- They are easy to use and save time (no need to drill a pilot hole first & no screwdriver needed).
- They are versatile – they can be used to fasten a variety of materials together
(they can be coated with zinc or nickel to protect them from rust or corrosion). - They are durable. They can withstand a lot of wear and tear.
- They are affordable. They are a cost-effective way to fasten materials together.
There are several different types of self-drilling screws available, each with their unique properties and advantages :
- Standard Self-Drilling Screws
Standard self-drilling screws are the most commonly used type of self-drilling screws. They feature a sharp point at the tip that can drill and tap its hole in one step, eliminating the need for a pre-drilled hole. They are available in various materials, including steel, stainless steel, and aluminium, making them ideal for a wide range of applications. - Bi-Metal Self-Drilling Screws
Bi-metal self-drilling screws are designed to be used in applications where the substrate material is hard or brittle, such as steel or concrete. They feature a drill point made from a high-speed steel that is welded to a carbon steel shank. This construction allows them to drill through hard materials while still maintaining their strength and durability. - Thread-Cutting Self-Drilling Screws
Thread-cutting self-drilling screws are designed to create threads as they are drilled into the material. They feature a flute at the tip that removes the material as the screw is drilled into the substrate, allowing it to cut its thread into the material. This makes them an excellent choice for applications where a strong, secure connection is required. - Composite Panel Self-Drilling Screws
Composite panel self-drilling screws are specifically designed for use with composite materials such as fiberglass, carbon fiber, or plastic. They feature a special point design that reduces the risk of splitting or cracking the composite material while still providing a secure connection. - Roofing Self-Drilling Screws
Roofing self-drilling screws are designed for use in roofing applications, such as attaching metal roofing sheets to a substrate. They feature a large, flat head that provides a secure connection while also providing a weather-resistant seal.
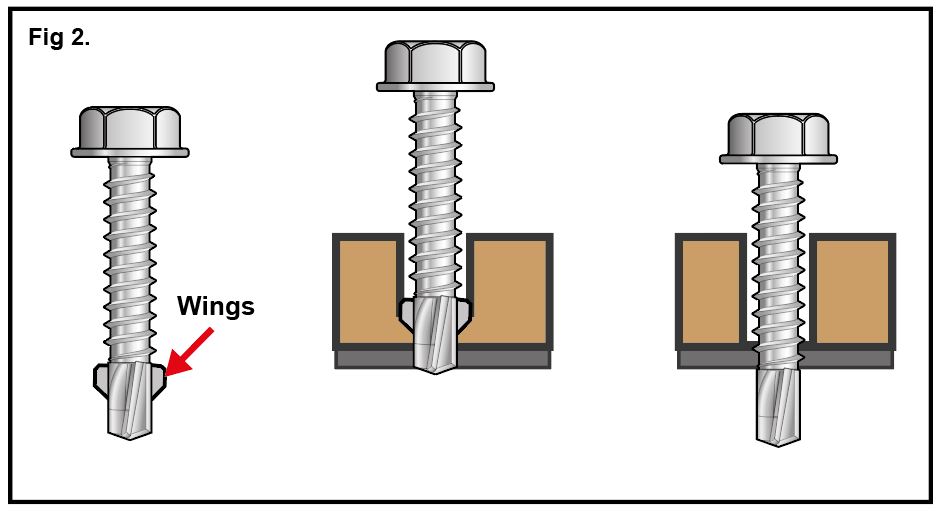
Some self drill screws have wings on the tip. These are to cut through a material (eg. Wood) to prevent the thread engagement until it reaches the metal underneath where the wings break off and allow the thread to engage (fig 2).
Self-drilling screws feature different head types to suit specific needs. The most common head types include flat, pan, oval, and hex. Flat heads sit flush with the material surface, providing a clean and smooth appearance. Pan heads have a rounded top and offer a larger bearing surface. Oval heads have a similar shape to pan heads but with a more tapered profile. Hex heads, on the other hand, are designed for enhanced grip and torque, ideal for applications requiring higher strength.
Self-drilling screws can also be fitted with anti-tamper heads which are specifically designed to prevent unauthorized access or tampering. These heads feature unique shapes and patterns that require specialized tools for installation and removal, adding an extra layer of security to applications where tamper resistance is crucial.
They come with different drill point types to suit specific applications. The most common drill point types include #1, #2, and #3. #1 drill points are ideal for thin metal applications, while #2 drill points offer versatility for both thin and thick metals. #3 drill points are designed for heavy-duty applications and can penetrate thick metals.
How to install a Self drilling screw
Step 1: Choose the Right Screw
The first step in installing a self-drilling screw is to choose the right screw for the job.
Different factors need to be considered as self-drilling metal screws are available in a number of specifications such as :
Material (carbon alloy, copper, stainless steel, aluminium, brass or polycarbonate).
Screws head (usually Phillips or hexagonal).
Chemical plating or coating (tin, zinc, phosphate, polycarbonate, copper, etc).
Diameter and length.
Also to be considered is the thickness of the panel and recommended installing force. Consult a manufacturers chart if available.
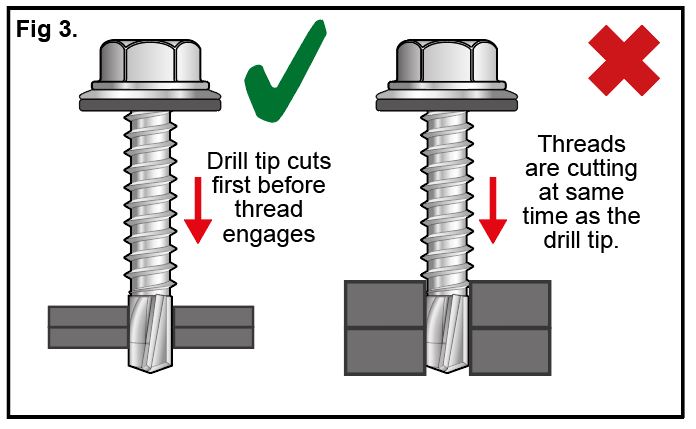
Essentially, the drilling tip must be longer than the thickness of the material. If it isn’t the thread will start to engage at the same speed as the cutting and could result in a shear breakage (fig 3). Also the material of the screw must be stronger the material installing into (e.g. Stainless Steel tip is good for aluminium material but not for steel).
Step 2: Prepare the Surface
Before you begin to install the screw, ensure that the surface is clean and free of debris. If necessary, use a wire brush or sandpaper to remove any rust, dirt, or other contaminants from the surface. This will ensure that the screw can penetrate the material properly.
Step 3: Set the Screw on the driver
Although drills can be used – impact drivers are better for installing as they are better suited to the job with more power that is distributed to give less strain on the workers arm and prevent stripping. Ensure that the impact driver possesses a hex adapter (you should be aware that an alternative may be required, depending on the screw head).
Fit the screw securely onto the driver’s adapter.
Step 4: Drive the Screw
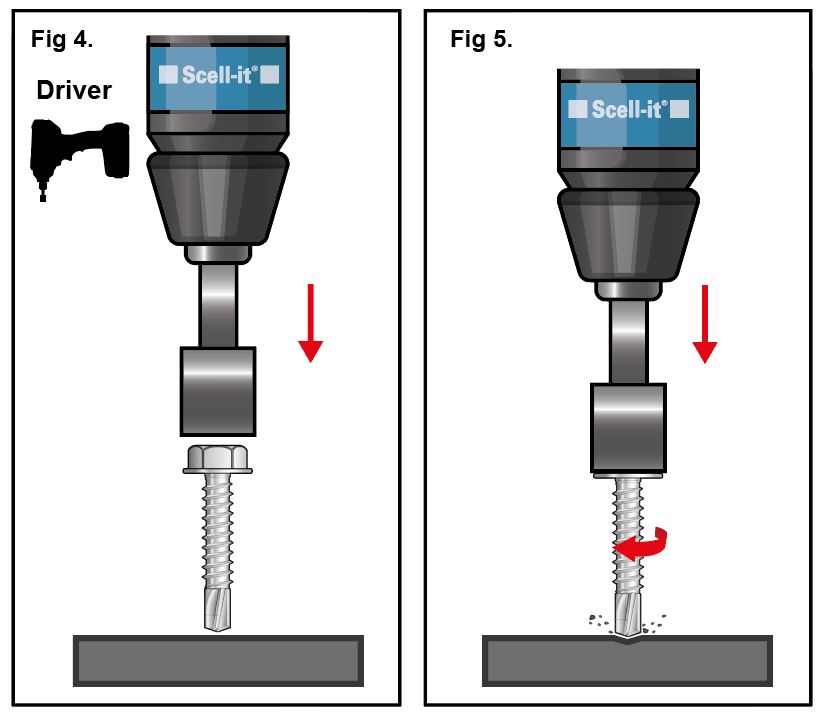
Next, confirm that you have clearly marked the point on the material where the screw needs to go and align the self-drilling screw point with the desired location on the surface. Engage the driver and begin to insert the screw. Use a slight pressure at first to allow for the screw to create a pilot hole and once this is through – more pressure can be applied (fig 4 & 5). Continue to drive the screw in until it is fully driven into the material.
It is essential NOT to over-tighten the screw, as this could damage the material or cause the screw to break.
Step 5: Inspect the Screw
Once the screw is fully installed, inspect it to ensure that it is securely in place. Check that the screw’s head is flush with the surface (if required) and that it is not sticking out or at an odd angle. If the screw is not in the right position, remove it and try again.
Conclusion
Self-drilling screws are a convenient and versatile way to fasten materials together without the need for pre-drilling a hole. They are easy to use and can save time and effort. If you are looking for a screw that can drill its own hole, self-drilling screws are a good option.
For more information or advice call scell-it UK on 0330 010 1650.


