Sleeve Anchors and how to install them.
What are Sleeve Anchors
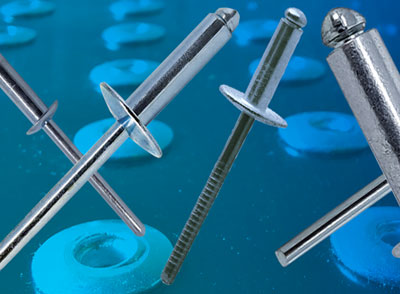
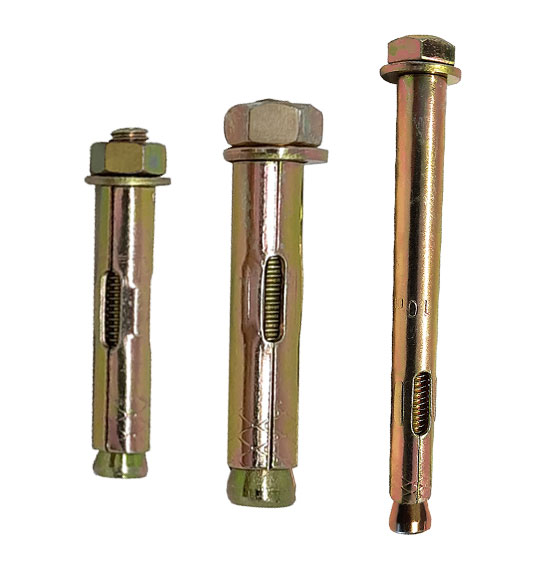 Sleeve anchors, also known as expansion anchors, offer exceptional versatility for securing fixtures into materials such as concrete and brick. With a wide range of diameters, lengths, and head styles—including hex nut, flat, countersunk, and round head—sleeve anchors provide reliable solutions for a variety of applications. Sleeve anchors were originally designed for brick work but later it was found that they could work in concrete situations starting from c20. They do not work well in softer materials such as No fines concrete.
Sleeve anchors create a secure bond by utilizing a sleeve or collar that expands outward as the bolt is tightened. This expansion exerts pressure against the base material, ensuring a firm and reliable grip.
Sleeve anchors are available in stainless steel for outdoor, wet environments, and zinc plated for indoor, dry environments. They come preassembled, so they are ready for immediate installation. Sleeve anchors are great for light to heavy duty fastening.
Installation of a Sleeve Anchor
1.Drill the hole
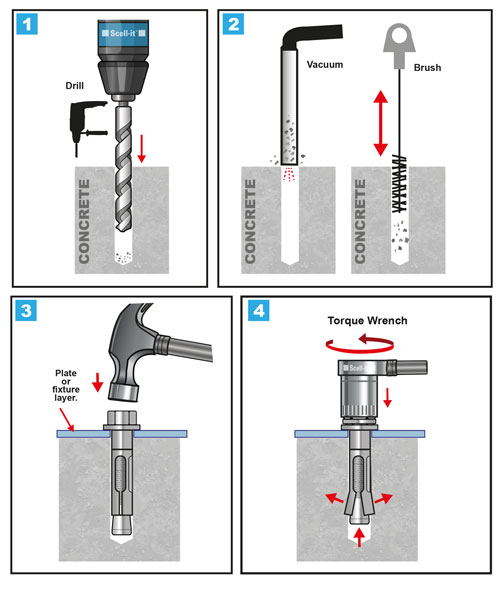
A hammer drill is recommended as the vibration pulls out the material from the hole. Sleeve anchors need a hole that is the same diameter as the anchor being installed (fig. 1).
To achieve maximum holding strength, sleeve anchors should be installed at the minimum embedment depth specified for each diameter by the manufacturer. Deeper embedments can further enhance holding capacity.
To ensure drilling the correct depth use the drill’s depth gauge or wrap a piece of tape around the bit at the correct depth
2. Clean the hole
Ensuring a clean hole is crucial for the successful installation of sleeve anchors. A well-prepared hole provides the optimal environment for the anchor to achieve its maximum holding capacity.
Use a wire brush that matches the diameter of the hole to thoroughly remove dust and debris. Rotate the brush in a circular and up-and-down motion while simultaneously using a vacuum to extract the debris. Repeat this process to guarantee a clean and debris-free hole (fig. 2).
While compressed air can be used to clean the hole, it’s important to note that this method may create a significant amount of dust. For a cleaner and more controlled environment, consider using a vacuum or a combination of both methods. If in doubt – carry out substrate strength tests prior to installation.
3.Install the anchor
Sleeve anchors come fully assembled with the nut and washer pre-attached. To install, position the nut flush with the top of the anchor’s threads to protect the threads during insertion.
Insert the anchor body through the hole in the item being fastened and into the pre-drilled hole in the base material. Gently tap the anchor with a hammer until the nut and washer are flush with the surface (fig. 3). If CSK sleeves are being used then check the major diameter of the CSK making sure that when the anchor is set it sits flush with the surface.
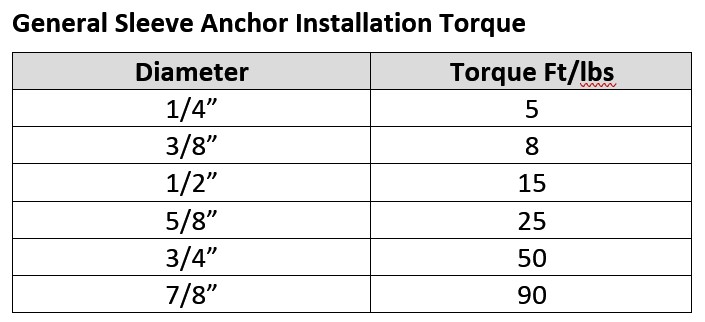
Tighten the nut by hand, then use a wrench or screwdriver to complete the expansion process. Turn clockwise three to five turns or until you reach the specified installation torque (fig. 4). It is essential that the correct torque settings are observed at all times. Over tightening will cause the substrate to become over stressed and will lead to possible failure.
continue reading