Using the E7 battery powered setting tool
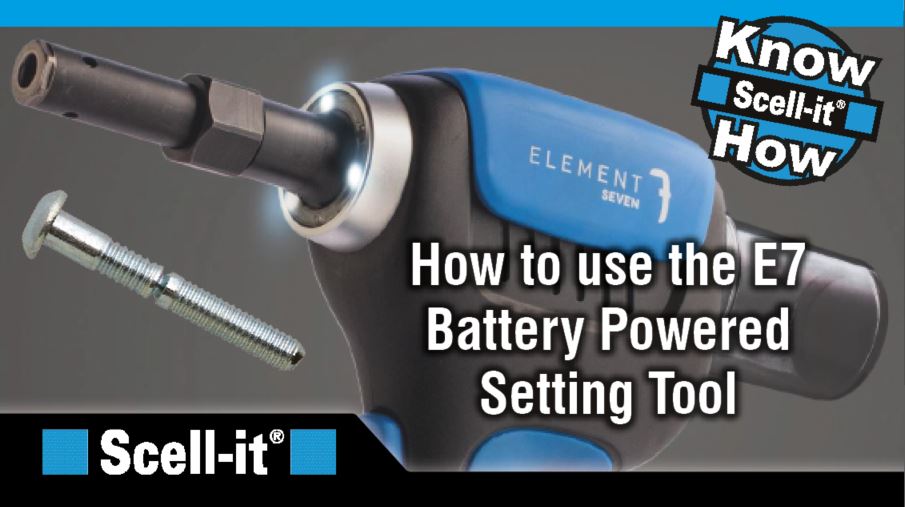
The E7 is our versatile battery-powered tool for setting ‘pin-and-collar’ fasteners (4.8 – 6.4) in all materials. It is simple to use and easy to set up. This quick guide shows how to set a typical pin-and-collar fastener into metal.
1. Check tool battery is powered up.
Ensure the tool battery has at least two indicator battery lights. The E7 comes with a standard Element One rechargeable battery and recharging unit.
2. Ensure the E7 has the correct installation kit for the pin and collar required for setting.
To install an installation kit :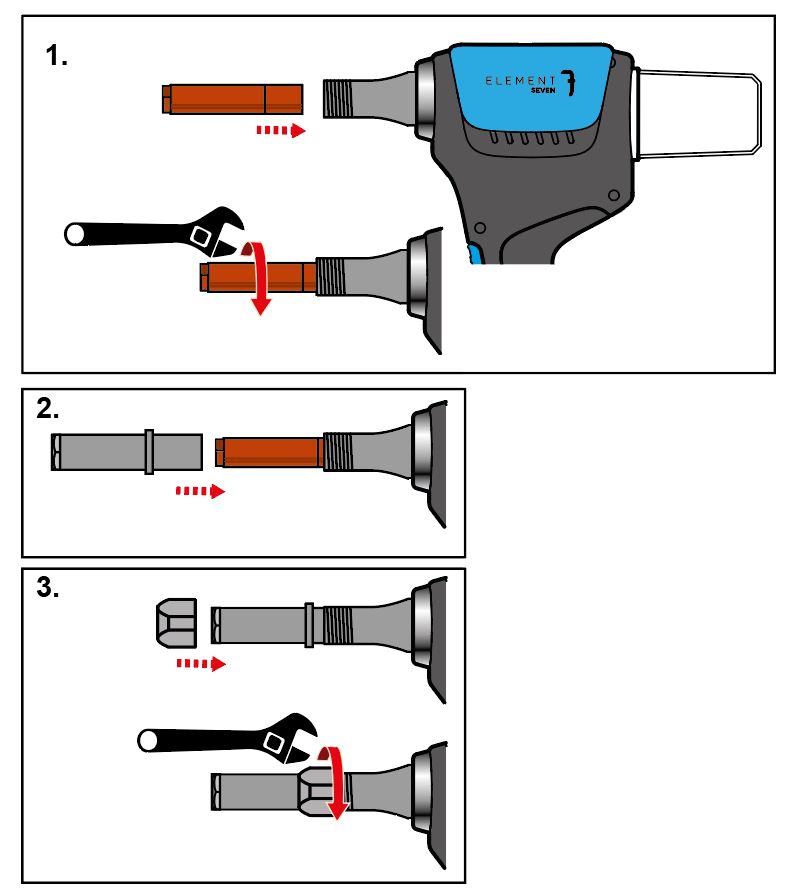
Remove the battery.
- Fit and screw on the internal part of the kit (coppery part). Tighten with a wrench.
2. Cover with the black metal sleeve.
3. Place over the big hex nut and tighten.
To remove an installation kit:
Reverse the above instructions for installing the kit.
3a. Setting a pin and collar.
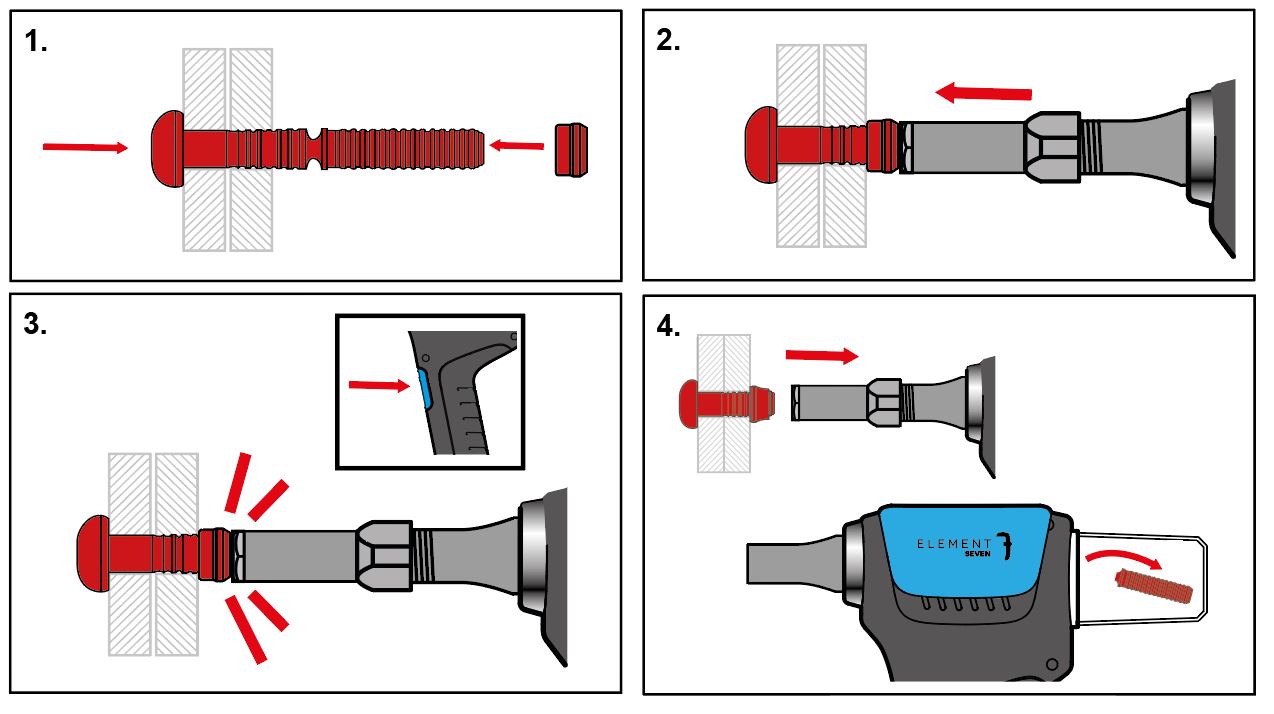 Place the pin into the hole and fit the collar onto it.
2. Insert the pin completely into the tool nose.
3. Press trigger until the pin breaks.
4. Broken pin will eject into the mandrel collector automatically or will be pushed through by the next pin inserted to be set.
3b. Setting a structural rivet
- Ensure the correct installation kit (KIT5) is fitted (see above instructions) and the correct nosepiece for size of rivet.
Changing the nosepiece
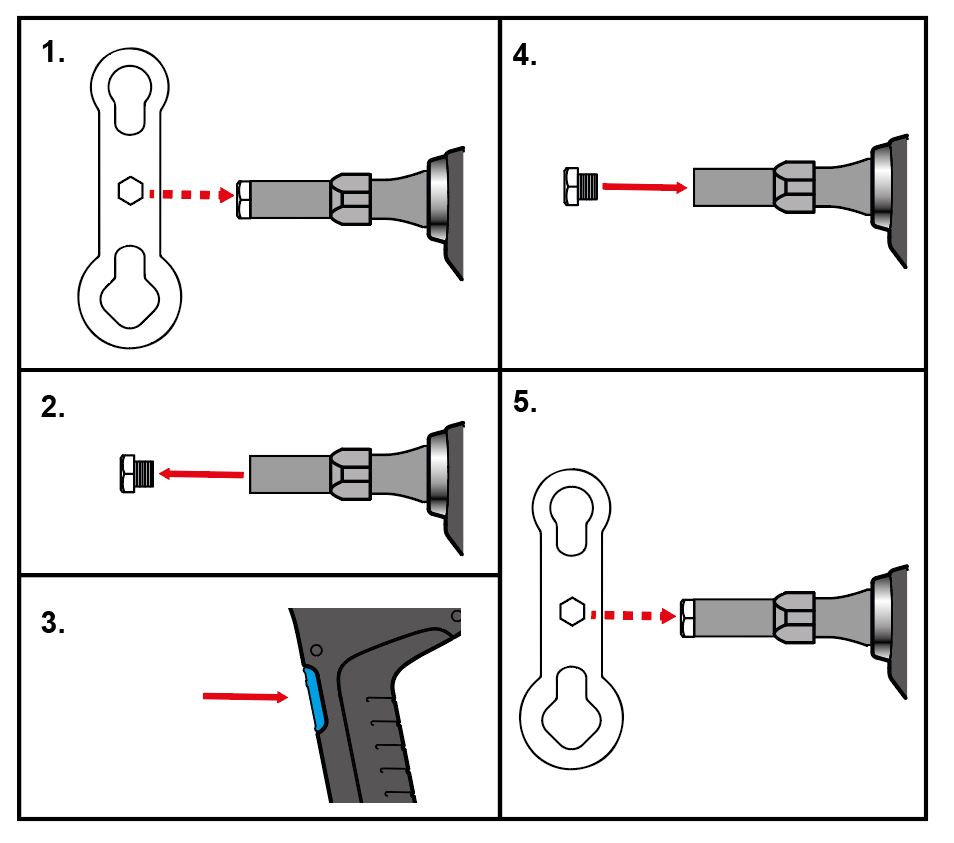 A specialised wrench is supplied with the tool.
1. Use the middle hole to unscrew the nosepiece and remove it.
2. Activate the trigger.
3. Press trigger and screw in the nosepiece.
4. Use special wrench to screw on the nosepiece and tighten.
2. Place the rivet mandrel into the nosepiece.
3. Place the rivet body in the hole of the assembling part.
4. Press trigger until the mandrel breaks.
Mandrel will eject into the collecting container.
In conclusion
The E-7 is simple to use and easy to set up. Watch the demonstration video on YouTube.
For any problems or further information please call Scell-it UK on 01785 246539.
continue reading

