Setting rivet nuts using the E-008 Battery powered Tool
The E-008 is our economy battery-powered tool for setting rivet nuts (M3 to M6) in all materials. It is simple to use and easy to set up. This quick guide shows how to set a typical standard rivnut into metal.

1. Check tool battery is powered up.
Ensure the tool battery has at least two indicator battery lights. The E-008 comes with a standard Element One rechargeable battery and recharging unit.
2. Ensure the mandrel on the tool matches with the rivet nut size.
To remove the mandrel: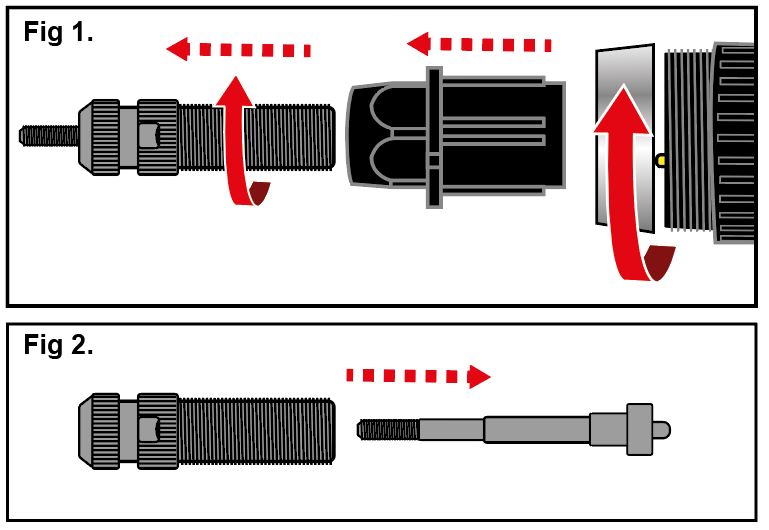
Remove the battery. Unscrew the ring, then remove the Anvil and Locknut unit.
Sperate the Anvil and Locknut unit from the Front Sleeve by unscrewing (fig 1).
Separate the mandrel (fig 2).
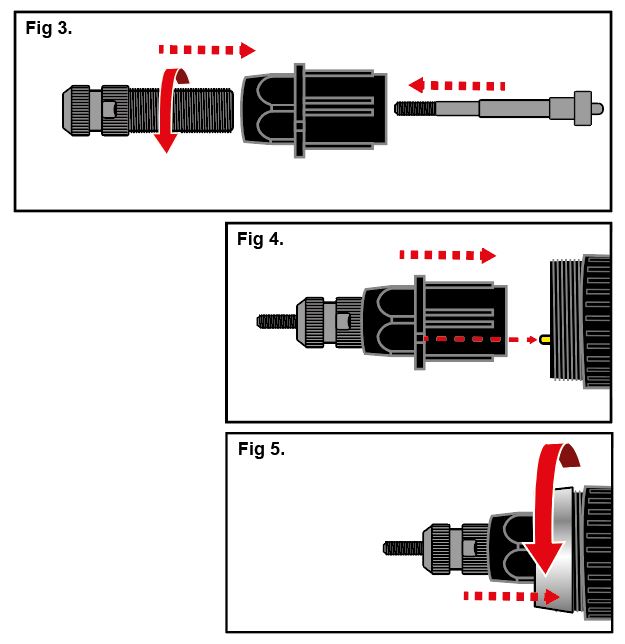
To fit a mandrel:
Screw Anvil and Locknut into Front Sleeve and insert mandrel (fig 3).
Place onto the tool by aligning the LEDs with the small notches (fig 4).
Screw silver ring back on (fig 5).
3. Set the stroke.
 Set the reverse button on the unit to the ‘screwing’ position (pushed in on the right side).
Turn the stroke setting dial on the back to set the stroke number scale from 0 (min) to 9 (max).
It is recommended to start at ‘2’ and perform tests until correct scale is achieved.
4. Load the Rivet nut
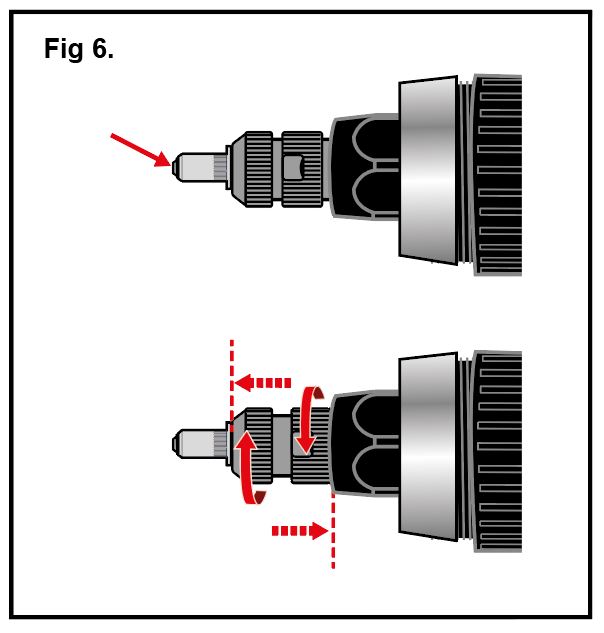
- Screw the rivet nut onto the mandrel until just one thread is showing.
- Tighten the anvil and locknut (fig 6).
5. Set the rivet nut
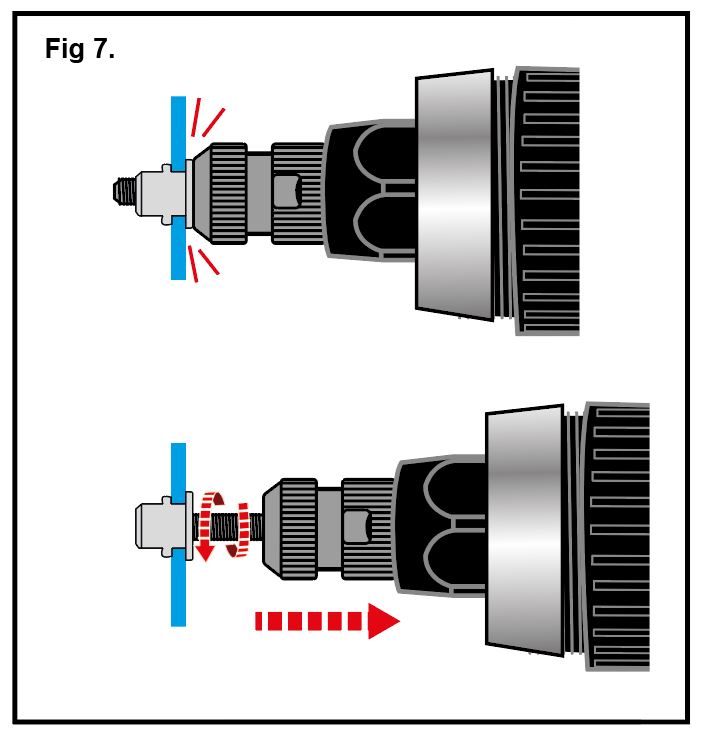
Insert the rivet nut through the installation hole – ensuring it is level and square.
Press the trigger to set the rivet nut and slowly pull back on the tool to enable the release of the tool(fig 7).
Check the rivet nut has set correctly and obtained the desired deformation (see chart).

If more or less stroke is required then adjust stroke setting dial and reset rivet nut.
Tool release
If the tool was not released at the end of the installation cycle try setting the reverse button to unscrew.
continue reading